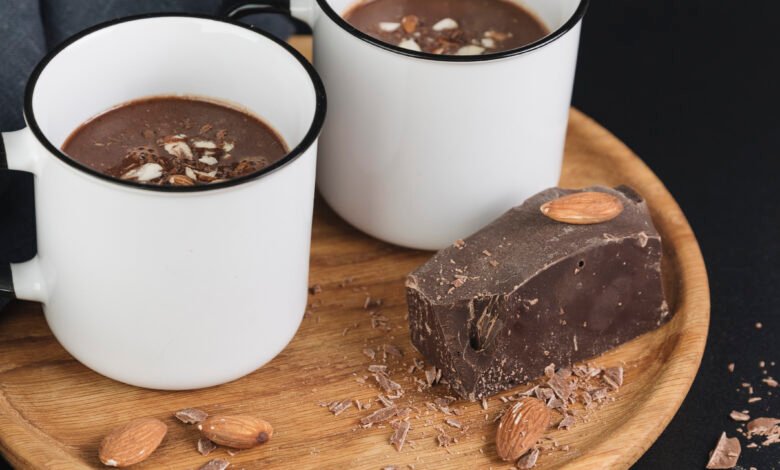
Best molten lava chocolate mug cake


This simple, 5 Minute Molten Lava Chocolate Mug Cake is a delightful treat that comes together in minutes. The moist, rich cake is almost as good as the real thing, with its decadent texture and rich chocolate flavor.
The cake is filled with a pool of molten chocolate that oozes out when you dig in, making each bite a truly indulgent experience.
I aimed to elevate it further, opting for butter and melted chocolate instead of oil and cocoa powder. This alteration lends the cake a heightened moistness and a flavor that closely mirrors that of a genuine molten chocolate cake.
The molten lava interior of this cake is achieved by adding 1-2 Lindor Dark Chocolate Truffles in the center before microwaving. Microwaves, unlike ovens, don’t work the same way and cook the middle almost as quickly as the edges, so the chocolate is crucial for the lava effect. Even if the chocolate sinks to the bottom, it will still be there!
Have you ever just wanted a piece of cake but didn’t want to bake an entire cake? Yeah, me too, more often than I care to admit. That’s where this microwave chocolate lava mug cake comes in. You can make individual-sized portions of yummy, gooey cake.
Molten chocolate lava cake holds a special place among my all-time favorite desserts. This rich, fudgy cake, filled with warm melted chocolate, is a true delight. You can’t go wrong with it, especially when topped with some vanilla ice cream. But making chocolate lava cake can be a bit of a process, and I don’t always have time for that. That’s why I love making a single serving in a coffee mug.
How to make best molten lava chocolate mug cake
Here are the best tips for creating the ultimate molten lava chocolate mug cake.
Ingredients
- Your favorite mug
- 1/4 cup flour
- 1/4 cup granulated sugar
- 2 tablespoons cocoa powder
- 1/2 tsp baking powder
- Pinch of salt
- 3 tablespoons unsalted butter, melted
- 3 tablespoons milk
- 1 egg
- 1/2 teaspoon vanilla extract
- 1 oz semi-sweet chocolate chips
- 1 tablespoon water
Choose the right kind of mug: It should be microwave safe and have around 10-12 oz of capacity (ideally 12). The cake won’t take up the full mug but can rise quite a bit in the microwave. Using a big enough mug will help ensure the batter does not spill and the cake doesn’t “explode.”
Using good quality dark chocolate: is crucial for determining the flavor of the cake. I used Lindt 70% dark chocolate, which made a significant difference in taste.
measure accurately:
Instead of using random spoons, measure accurately using proper measuring spoons to get the quantities right. For flour, make sure to first fluff it up and then add it to the spoon, swiping off any excess.
Sift the dry ingredients to minimize any lumps. Since we’re essentially dumping everything into the mug, it’s a good idea to sift the dry ingredients first.
Adjust the sweetness to your preference – you can use anywhere from 1.5 to 3 tablespoons of sugar.
I suggest leaning towards undercooking rather than overcooking. This cake only takes 60-70 seconds in my microwave. It’s better to err on the side of less time than more, as you want the cake to have a gooey, moist texture similar to a molten chocolate cake.
Gather all of your ingredients. Melt your butter in the microwave. Whisk together with a fork the flour, sugar, cocoa powder, baking powder, and salt until well combined in a mug. Add the melted butter, milk, egg, and vanilla. Whisk well to combine, making sure to mix in the flour mixture in the bottom.
Place the semi-sweet chocolate chips in the center of the mug, then drizzle the tablespoon of water right on top of the batter. Cook in the microwave for 1-2 minutes or until the cake rises to the top and the edges look set. The center will look slightly wet and shiny but not raw, and it will stick slightly to the finger when touched.
then,
Let your chocolate lava mug cake cool for about 5 minutes.
Tips for making Chocolate Lava Mug Cake:
- Do not overcook! You want to make sure you have a nice gooey center. My sweet spot is 1 minute and 15 seconds to get the perfect lava cake. Start by microwaving for a minute and check your cake.
- Go crazy and add caramel, nuts, fruit preserves, or peanut butter to the center!
- Dust the top with powdered sugar or vanilla ice cream.
Chocolate Lava Cake Storage Instructions:
To store chocolate lava cakes, first, allow them to cool to room temperature. Next, wrap the cakes firmly in plastic wrap. Place the wrapped cakes in an airtight container and store them in the fridge for up to three days.
Reheat chocolate lava cake:
Preheat your conventional oven to 400°F. Place the cake on a baking sheet lined with a silicone liner or parchment paper to catch any lava leaks. Bake in the preheated oven for 5-6 minutes. Remove from the oven with an oven mitt and serve hot to enjoy.
Conclusion:
In conclusion, mastering the perfect molten lava chocolate mug cake involves understanding your microwave’s power and cooking time, avoiding overfilling the mug, and experimenting with additional ingredients like marshmallows or graham crackers for added texture and flavor. It’s a dessert that allows for creativity and personalization, making it a delightful treat that can be enjoyed in just a few minutes.
FAQS
How to know when a mug cake is done?
Cooking microwave cakes can be tricky, as the time needed varies due to different microwave power settings and mug sizes. This cake typically cooks in 60-70 seconds, but it’s important to visually check its doneness. When in doubt, err on the side of less time, as overcooking can result in a dry, crumbly texture instead of the desired moist, gooey consistency.
How can we Store leftover chocolate lava cake?
Once the cake is removed from the oven, let it sit for a longer time to continue cooking and for the center to solidify. If you want to refrigerate your baked cakes, cover them with plastic wrap and store them in the refrigerator for up to three days.
How can I save chocolate lava cake?
To bake the chocolate lava cakes, first, allow them to cool completely. Then, freeze the cakes until they are solidified. Wrap each cake well in plastic wrap and store them in an airtight container in the freezer for up to one month. When you’re ready to enjoy them, thaw the frozen lava cakes overnight in the fridge and reheat them in the oven at 350°F for about 8 minutes.
Why did my mug cake fail?
When making a mug cake, it’s crucial not to overfill your mug with ingredients. Despite having the perfect mini whisk, mishaps can still occur. One common mistake is filling the mug too much. Similar to other baked goods, mug cakes rise as they cook.
The fancy name for chocolate lava cake is “molten chocolate cake.”
Molten chocolate cake is a French dessert consisting of a chocolate cake with a liquid chocolate core. It is named for its molten center and is also known as mi-quite au chocolate, chocolate coulante (“flowing”), chocolate lava cake, or simply lava cake.
Who invented lava cake?
The lava cake was invented by Chef Jean-Georges Vongerichten at his restaurant in New York. While there is some dispute about the original founder, Chef Jean-Georges has been serving it on his menu for decades. A lava cake is essentially a sponge cake that isn’t fully cooked and has a runny center.
Can I eat raw mug cake?
Because microwaves cook differently, the cooking time for mug cakes is approximate. It’s important not to eat raw cake batter. For added flavor, Betty’s tips include sprinkling the cake with mini marshmallows and a crumbled graham cracker after topping, or serving it topped with candy sprinkles.
Chocolate lava cake healthy?
One Eggless Chocolate Lava Cake provides 220 calories, of which carbohydrates comprise 220 calories, proteins account for 23 calories, and the remaining calories come from fat, totaling 218 calories. This cake provides about 21 percent of the total daily calorie requirement of a standard adult diet of 2,000 calories.
Another recipes:


